
Malting 101
Curious about the malting process?

Our Customer Success Representative Tina Hoffert comes to Riverbend with a professional brewing background, and she’s here in this post to break down the malting process. Without further ado…
Beer is considered one of the oldest fermented beverages in the world. It is generally made from raw cereals, malted cereals, and bread. The process of making beer and cereal-based spirits uses the biochemical processes as follows: formation of enzymes and available starches from germination of grain (malting), breakdown of starches to fermentable sugars using malted grains (brewing), then fermenting the mash or wort to produce CO2 and alcohol (fermentation). For spirits, there is another step of separating and concentrating the alcohol from the fermented mixture by distillation. For brewers and distillers alike, they need the available extract (or fermentable sugars) found in the grain and adjuncts to produce their desired alcohol content in the end product. Malting is the process of taking raw cereals and using the seed’s natural germination cycle to modify the grains to have available extract and enzymes for brewing. In the malt house the process follows four main steps: steeping, germination, kilning, and packaging.
Malting Step One: Steeping
The first step of malting is the steeping step. This process involved soaking the grain in water, which starts the germination process. The water awakens the dormant grain and increases moisture content inside the grain to the correct level for germination. The steep water must be a controlled temperature to achieve appropriate modification. With elevated temperatures, water uptake would be faster but microbial growth would also be accelerated. With lower temperatures, the water uptake would be slower and take up unnecessary time. The steep water is periodically changed and refreshed during the steeping process. During the water change, air is brought through the malt to exchange CO2 for oxygen and reduce heat produced during steeping (called an air rest). Alternating between the steeping and air rest steps is determined by the maltster depending on the specific product being made.
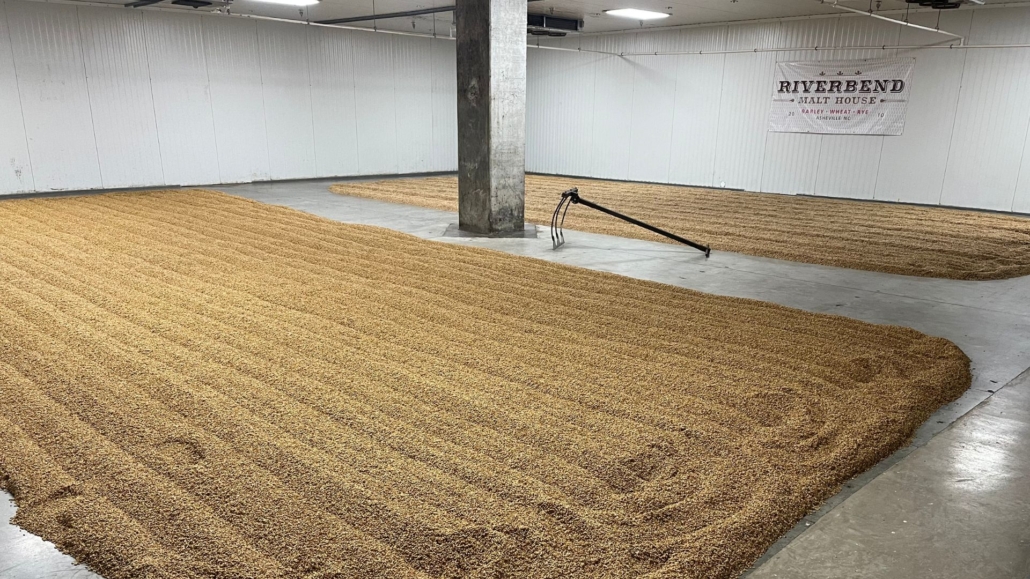
Malting Step Two: Germination
After steeping, the next step in malting is the germination process. The onset of germination is indicated by the small, white “chit” at the end of the grain. This is also when the shoot, called the acrospire, starts to grow. The grain is allowed to grow to a certain point until rootlets sprout at the end of the grain. Germination produces enzymes in the grain, needed for starch conversion during brewing. Many hydrolytic enzymes increase in number during this step and the modification of the starchy endosperm takes place. The starchy endosperm softens, and the plant cell walls break down so that starch is exposed to enzymes that can convert starch to fermentable sugars. During this step it is essential that maltsters turn the grain bed to avoid tangling and clumping from rootlets. This can be done several ways such as using a plow for floor malting or GKV (germination-kilning vessel) for higher volume production. It’s also important to monitor aeration and temperature during germination to avoid overheating the grain bed. When the material is done with this step, it is considered green malt.
Malting Step Three: Kilning
If germination were allowed to continue to the end, the plant would consume all the starch and sugars that brewers and distillers want for ethanol production. So the next step is to kiln the cereal. This process halts germination and builds the malt flavor profiles used in craft beverage production. Green malt is moved to a kiln where hot air is moved through the grain bed to dry and remove moisture from the grain. Lower temperatures for longer periods of time will give sensory characteristics of base malts, such as pilsner or pale malt. And higher temperatures at faster rates will give characteristics of specialty malts, such as munich or vienna. Crystal malts are achieved by “stewing” the malt, which is holding high temperatures and high moisture content in the kiln in order to stew the grain and create the crystalized material. Some maltsters also have roasters, which roast material to produce dark malts used in stouts and porters.
Malting Step Four: Cleaning & Packaging
The final step of malting is cleaning the material and packaging it. First is rootlet removal, where grain is passed through a debearder and rootlet material is removed from the malt. The next step is screening and separation. The malt is passed through a series of screens where only desired grain size and weight is allowed to pass through. Often this step incorporates fans, and lighter materials are separated from the desired malt by blowing air through the malt and blowing away the unwanted material. Once the malt has been cleaned, it is packaged and ready for the consumer.
– Written by Tina Hoffert
Sources:
Briggs, D., Boulton, C., Brookes, P., and Stevens, R. (2004) Brewing Science and Practice. Woodhead Publishing.
Briggs, D.E. (1998) Malts and maltings. London: Blackie Academic & Professional.
Kunze, W. (2019) Technology Brewing and Malting. 6th edn. VLB Berlin.
Russell, I., Stewart, G.G. and Kellershohn, J. (2022) Whisky and other spirits : technology, production and marketing. Third edition. London: Academic Press.